Showing posts with label Tangling. Show all posts

Aug 19, 2014

Nautilus


 Mixed Media
21 x 15"
Strathmore Smooth Bristol Board

This is a piece I recently completed with the hopes of gaining more experience with colored pencils.  This is a new medium for me even though I purchased Faber-Castell Polychromos some time ago and added Caran d'Ache Luminance pencils for this project, I have completed only one other piece and used a very limited palette.  I really wanted to practice layering and shading and include other mediums in the mix.

Because this was more about color application and I didn't want to think about design, I dowloaded one of Ben Kwok's wonderful templates from the Facebook Ornation Creation group page and enlarged it at a local print shop.  The image itself measures 15 x 11".  I found out this was quite a bit of real estate to cover, this took about 45 hours to complete!
 Detail of center.

Detail of Golden Interference Orange Fluid Acrylic Paint
The interference paint in some areas really made things pop.  From one angle the paint appears orange and from the opposite angle it appears teal.  The little ovals all around the edge and the swirl in the center were painted with Golden Iridescent Copper Light. This photo also shows the need for mastering the waxy bloom of layering colored pencils.  Even with the use of Gamsol between some of the layers, my heavier dark color application at the end produced bloom.  Gotta work on that!

Speaking of layers,the following shots show the progression of color application which began with a light wash of Daniel Smith Hansa Yellow Light watercolor and then worked up from there with the Caran d'Ache Luminence colored pencils.


Thanks for stopping by!

Mar 16, 2014

NATALIE'S GOLDFINCH

NATALIE'S GOLDFINCH
14 X 17"  On Bristol Vellum
Colored Pencil , Ink , Graphite & Gold Leaf


This piece was a request from my daughter for my grand-daughter's birthday in May.  It was also my first experiment on Bristol vellum with colored pencils.  I love working with the Faber Castell Polychromos, layer upon layer of shading and texture.  It's a workout on the hands though!  Micron pens .05 and .01 were used on the ribbon.  The ribbon was a challenge, I actually had about eight hours into this piece before I put it aside and started over from scratch.  The ribbon was just not working and there are a few things I learned in the process that I will put into practice when I include a tangled ribbon in future projects. Helen Williams' e-book available on her blog A Little Lime, was a tremendous help.

All shading outside of the ribbon, "N" and goldfinch was done with 2B, 6B and 8B graphite pencils and a paper stub. One thing I'd like to pass on and which was new to me; when using a blending stub it's good to sand the end frequently so the colored pencil doesn't build up on the end of the stub making blending of the graphite far more difficult.  I couldn't help touching the edge of the colored pencil area as I was adding my shadows and noticed problems as I tried to blend the graphite.

Lastly, I just had to add some gold leaf in a few spots and was very happy with the outcome.  Another word of caution about the gold leaf sizing on paper.  Give it plenty of time to dry!  If you smear it outside of the desired area you get to spend some really anxious moments gently removing it from the paper with an Xacto knife!

Thanks for stopping by!

Feb 9, 2014

Zendala Dare #88


Zendala Dare #88

This is my first completed Zendala Dare; template is available through The Bright Owl.  The templates are outline zendalas ready to download, print and tangle.  I think the most amazing thing about this process is the zendala you start with sometimes ends barely resembling the original.  And the tangles create the magic with color placement.  

If you compare the original template #88 from The Bright Owl, you can see the dramatic difference just in the addition of three tangle patterns with the picture below.


There are only three tangle patterns used here; Paradox, Girders (used in the center) and a fan type fill I used at the top of each segment. Paradox is available here on YouTube.  Paradox provides many varied and interesting results based on the shape you start with.  If this statement sounds confusing, watch the video and it will become more clear.  I started thinking I was going to apply color in a certain way and when I set the piece down and then walked by it later, the sections popped out at me in a completely different way.  So that's what I went with.

After printing the zendala outline on an ink jet printer, I used Canson semi-transparent marker paper as an overlay and traced the zendala in non-photo blue pencil.  After all of the tangle patterns were added I photo copied the piece onto Xpress It Cardstock (specifically made for Copics) and added my color.  I also applied the same color technique to the Canson which works very nicely and saves a photocopy step.  Both papers are great with inks.  

Color was applied with Copic markers:  R22, R24, R29, BG10, BG13, BG25, V12, V15, V17, YR21, YR23, YR24 with warm grays in W1, W3, W5 and W7.

Tangles patterns drawn with a Micron .01 pen.

Thanks for stopping by!


Jan 28, 2014

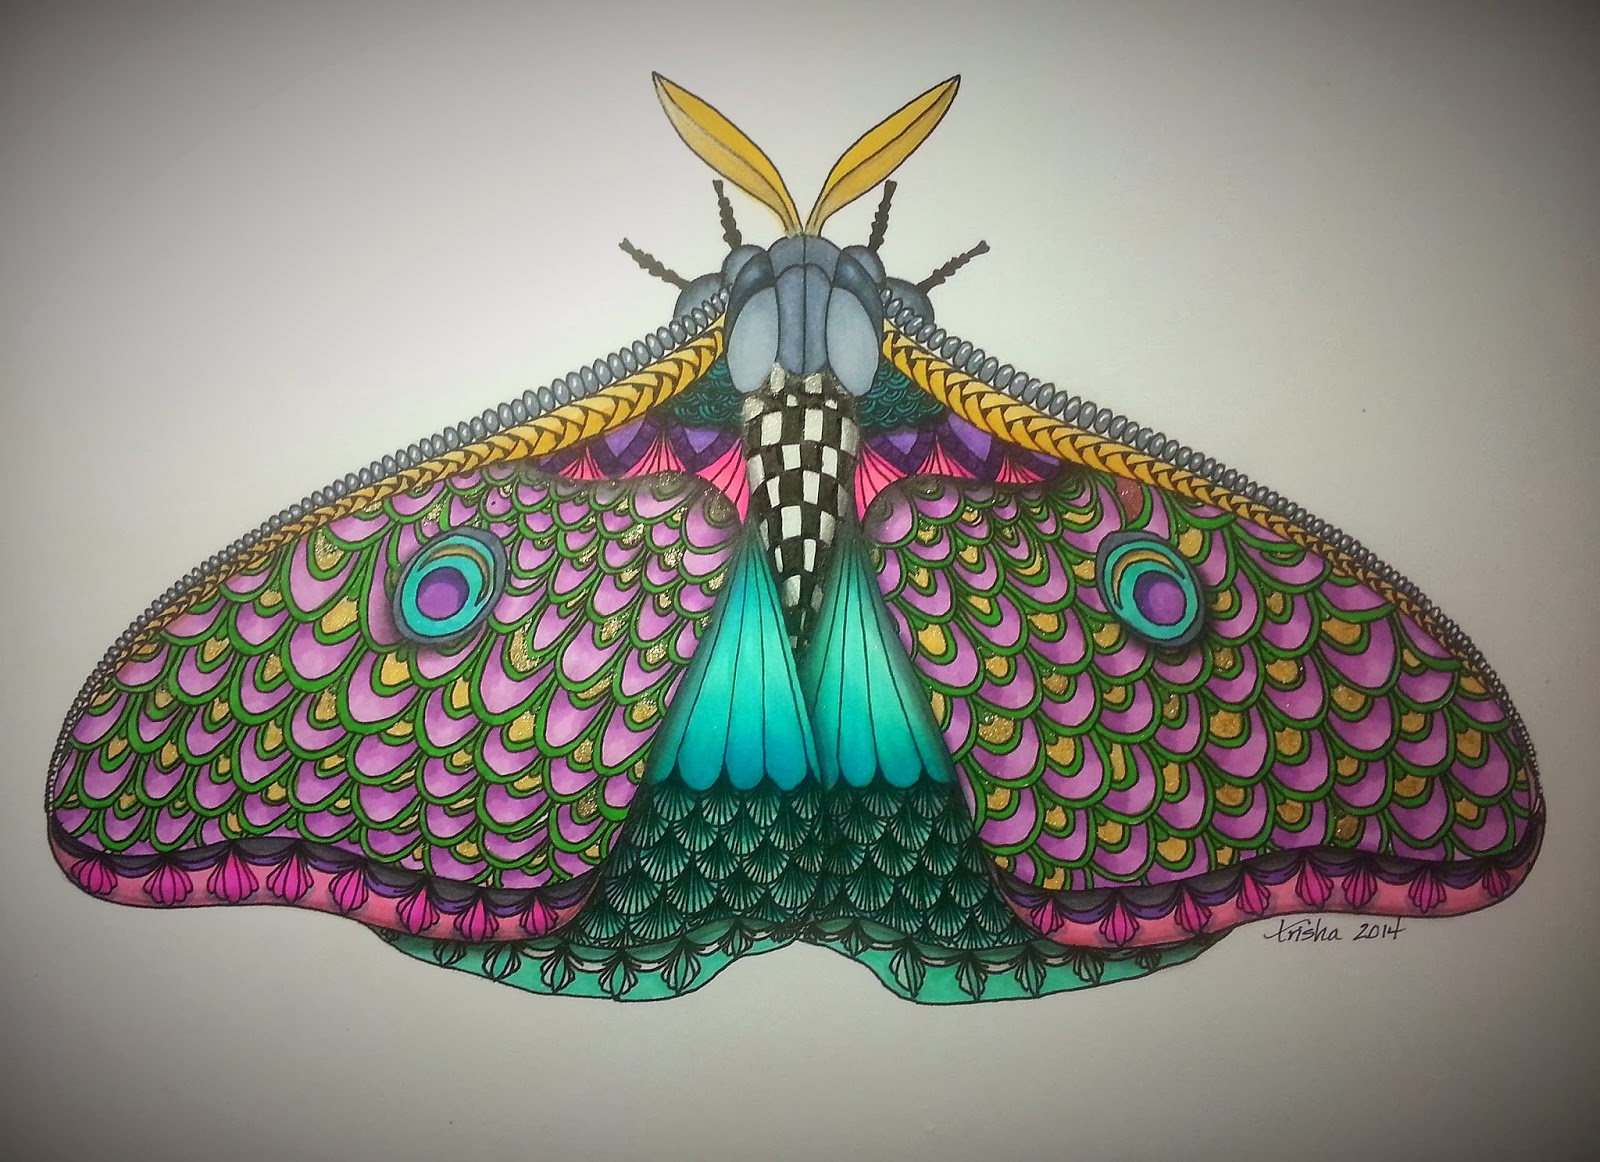
Tangled Peacock Moth

Tangled Peacock Moth


Tangling and Copics, that's been so much of what I've been doing lately.  All I can say is it's so much fun to see things take shape and I just want to start another!

Ben Kwok posts such beautiful blue line templates on Facebook that adding the interior design with tangle patterns and then color application with Copic alcohol markers provides so many creative avenues.  So here is the moth template with a few design changes of my own.  I continue to want to give a peacock feel to everything, I hope the moth doesn't mind the cross breeding!  I'm still experimenting; I've used the micron pens in 01, Copic alcohol markers, graphite pencil and a glitter brush on Xpress It card stock.  That's about it.  I need to take a break and get back to my watercolors soon.  Well, maybe one more tangled template.......

Sep 6, 2013

PHYLLIS WITH TWO I'S - EYES!

Meet Phillis!
 
My son-in-law requested a sign for the front of his Russian tortoise's new home located in the "tortoise habitat" of their yard.  Phillis, spelled with two i's, because Phillis has two ;-), is a very lucky girl.  You can't believe the splendor!

That said, the request was made for natural colors so I started with a latte colored, handmade pastel paper.  It presented some challenges because of the softness and texture but in the end I enjoyed working with it.  I used mostly an 05 Micron pen for the tangle patterns and an 08 for all of the outlining. This is by far the largest  piece I've completed using tangle patterns; the outlining and letters alone took seven hours.The piece finished up at 16 inches square or there about and I finished the edges with a deckle edge pair of scissors.  Phillis (the picture) is at Staples as this is being posted, waiting for lamination.  I thought about all kinds of different all-weather coatings and finally ended up with lamination.  The finished piece will be adhered to plywood, sealed and hung on the new house. 

I had an enormous amount of fun working on this and it's spawned a whirlwind of nature images in my head.  I best go feed the beasties!

Thanks for stopping by!

Jul 28, 2013

LIMITED COLOR CELTIC #31


I posted this same Celtic knot last week which had Copic alcohol pens applied to the entire piece.  This week I wanted to try the same knot with a limited amount of color to see what the results would be. 
 
I used a cobalt turquoise #153 Faber-Castell PITT pen for the blue which turned out to be a good choice.  The reason being when I shaded with my Copics, the blue did not move at all when the alcohol pens were applied on top.  Had I used Copics for the blue I probably would have had issues adding the shading in grey.
 
The shading was done with Copics W0, W1, W3 and some W5.
 
 
Thanks for stopping by!


Jul 23, 2013

CELTIC CHALLENGE #31


The above Celtic knot is offered up in answer to Judy West's Celtic Knot Challenge #31.  I'm not submitting this piece because it does not comply with the parameters of the challenge in that each and every section had to contain a different tangle pattern.  I just couldn't bring myself to put 36 patterns in this one piece, I have no courage.  So I used a wee 6 tangle patterns and some color and this is what I got.
 
The piece measures 8 x 8 inches, was drawn on X-Press It card stock for alcohol pens and I used my Copic markers for the color application.  Then things sort of went sideways when I decided to use a graphite pencil to shade the intersections of the tangles instead of just sticking with my Copics.  Don't know what I was thinking but lesson learned.
 
I still had fun with this technique, I'd never tried a Celtic knot combined with tangle patterns and it's the first time I've combined my Copics with tangling.  All in all I'm glad I tried it.
 
 
Thanks for stopping by!


Jul 14, 2013

Tangled With Color

I've been caught up in Zentangle (a registered trademark) and tangling for the last two months or so and am absolutely enjoying every minute I spend on it.  The world goes away and I love getting lost in the art.

If you're unfamiliar with Zentangle, Google it and you'll be amazed at the sites and blogs devoted to this unique art form.  There's some really beautiful work being made out there.

I decided to start experimenting with color and have started a couple of larger Zentangle inspired pieces which are still works in progress.  I've been using watercolor pencils and Copic markers up 'till now and applying the color and shading to the completed line art.  However, I was inspired by Rosemary Hill, a Certified Zentangle Teacher, to use a different method and the three test pieces are shown below.


This first and the following two pieces are 3 1/2 x 3 1/2 inch square tiles on Tiepolo  paper.
 
I added splotches of Tim Holtz Distress Stain, misted with water and tilted the tile to let the color run where it would until I was satisfied.  A light selective blotting with a paper towel and then drying with a heat tool provided a good start.
I didn't draw a string but let the segments of color determine where I would place the individual patterns and even what choice of patterns I made.


This turned out to be a lot of fun, I'm definitely going to be playing with this more!
 
***************
 
If you live on the north coast or plan on being in the area Saturday, August 3rd, our local art store, Dots N Doodles Art Supply will be hosting Rosemary Hill with two, two hour Zentangle classes, Zetangle1 and Zentangle 2.  It's going to be a full afternoon well worth the time.  The response to the classes had been exceptional and there aren't many spots left so if you're interested, give the site and their blog a look-see and then give them a call or a fast email.
 
Thanks for stopping by!
 
Trisha


Powered By Blogger

Recent News

Translate

Search This Blog